Installation process (NA)
General specifications
Teltocharge tethered with Type 1 cable
| Dimensions without cable | 170x341x97 mm |
| Weight without cable | 2.8 kg |
| Operating temperature | -30°C - +50°C |
| IP rating | IP55 |
| IK rating | IK10 |
| Certification | UL2594 |
| In compliance with | IEC 61851-1 |
Electrical specifications
Here you can find information about electric parameters of Teltocharge product
| AC INPUT SPECIFICATIONS | |||
|---|---|---|---|
| Maximum power | 7,6 kW | 9,6 kW | 11,5 kW |
| Input AC power connection | 2 phases | ||
| Maximum current | 32 A | 40 A | 48 A |
| Input voltage | 2 phases: (L-L) 240 ± 10% VAC | ||
| Rated frequency | 50 / 60 HZ | ||
| Standby power consumption | 4 W | ||
| Earth (ground) fault protection | 20 mA AC, 6 mA DC | ||
| Overvoltage category | OVC II | ||
| Protection against electric shock | Class I | ||
| AC Output specifications | |||
| AC output voltage range | 1 phase: (L-N) 240 ± 10% VAC | ||
| Connection Standart | Type 1 cable | ||
| Connection to the grid | NEMA 6-50 plug to the wall socket | Direct cable from house grid
(Hardwired) | |
| Power Cable | |||
| Maximum cable diameter | 17.5 mm | 20,75 mm | |
| Maximum wire cross section | 7.5 mm2 | ||
Product code structure
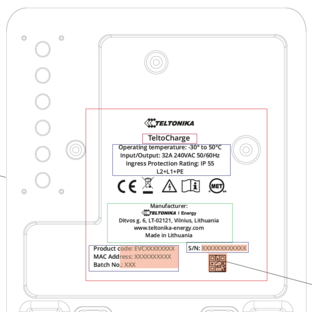
On the product Middle plate you can find markings showing its Product name and code, Certifications, Serial number and more.
| Model | Version | Power | Connector | Connectivity | Front plate color | Front plate finish |
| A | B | C | D | E | F | G |
| EVC | 1 - V1 | 3 - US 7,6 kW, 1/2P, 32A, 120/240V
4 - US 9,6 kW, 1/2P, 40A, 120/240V 5 - US 11.5kW, 1/2P, 48A, 120/240V |
1 - Tethered cable | 0 - Without GSM modem | P - Gray
R - Red M - Blue B - White 0 - N/A |
0 – Without front panel
1 – Tethered cable |
Required tools
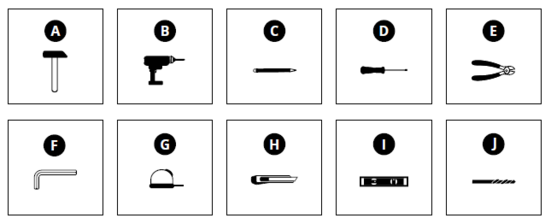
List of required tools include:
A - Hammer
B - Electric drill
C - Pencil
D - Screwdriver
E - Cutting pliers
F - Allen key 2,5 mm
G - Measuring tape
H - Utility knife
I - Level
J - Drill bit D6
Included Mounting parts
Included in the box you will find:
K - Wall plugs 6x35 mm
L - Pan head self-tapping screws galvanized steel
M - DIN912 M3x8 screws
N - Cable gland
O - Rubber washer
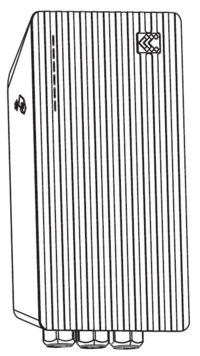
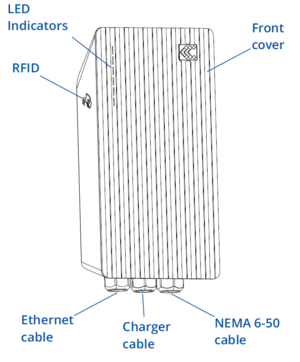
EV Charger Main elements
Site preparation requirements
- Find a suitable site on a wall (The mounting surface required to be flat and stable, for example a finished, brick or concrete wall. Wall required to be suitable to withstand TeltoCharge weight with charging cable).
- Make sure that the required power supply is easily accessible. (Required power supply depends on the type of charger).
- Recommendation is not to install TeltoCharge on direct sunlight to avoid overheating.
Installation process
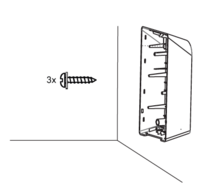
Housing Installation
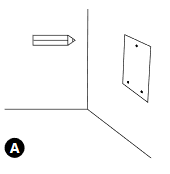 A - Place the drilling template on the wall and mark the three fixing points.
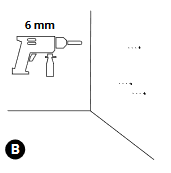 B - Drill holes where the fixing points are marked.
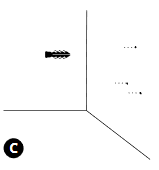 C - Insert the wall plugs into the fixing holes.
Fix the device on the wall by inserting the self-tapping screws with rubber washers (start with the top screw and make sure the housing is horizontal)
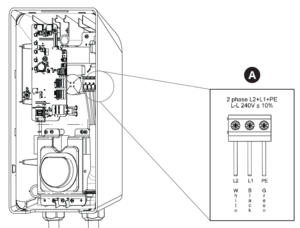
Electrical wiring
Network type:
A - IT/TT two phase set up.
Notice 1: Products EVC131 (32Amp) and EVC141 (40 Amp) come with pre-wired NEMA 6-50 plug. These models have to be connected to pro properly selected wall socket which meets the same NEMA 6-50 standard.
Notice 2: Voltages in different installations may vary. Please check configuration of Installer menu Connection type settings in mobile application and select either delta or star connection.
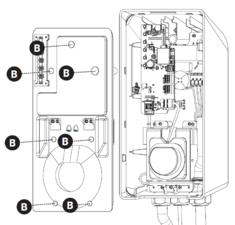
Closing the middle panel
A - Place a middle panel on the housing and press it, till it clicks.
B - Fix it using DIN912 M3x8 screws;
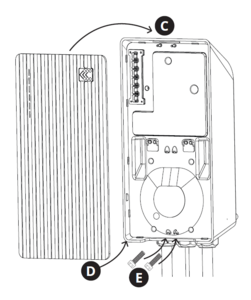
Closing the front plate;
C - Lock the top of the plate;
D - Lock the bottom of the plate;
E - Fix it using DIN912 M3x8 screws;
LED indicators
Information about how LED indicators signal different states can be obtained from here
Connection to the EV charger
Step 1 - Download the Teltonika Energy App
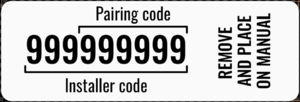
Step 2 - Pair a charger and mobile device using Bluetooth. Device will ask to insert Pairing code which is represented by last 6 digits of Installer code. Sticker with security code can be found on the Middle plate.
- More details on pairing procedure can be found in FAQ section of Wiki page.
